Giving Thanks, Pie

IMG_1600


Giving thanks. This year I have a wealth to give thanks for, so much so that ‘thanks’ seems a mild word. Thanks, blessings, gratitude, gratefulness – ball them all together, and the Pangaea like word that forms might begin to honor how I feel. I  visualize my blessing, a dictionaryesque tome, perched on a podium where it’s always open revealing a letter at random; R, R is for rain, radishes, Red Tailed Hawks, Robin O’Brien, romaine, roses, row cover…. From April to zucchini, the expanse of this year’s blessings, and all chapters of gratitude before, keep me in constant grace towards life. They make even the hard days of labor and loss be ones that hold great depths of thanks.

Somewhere in that tome is T for Thanksgiving and definitely P for PIE!
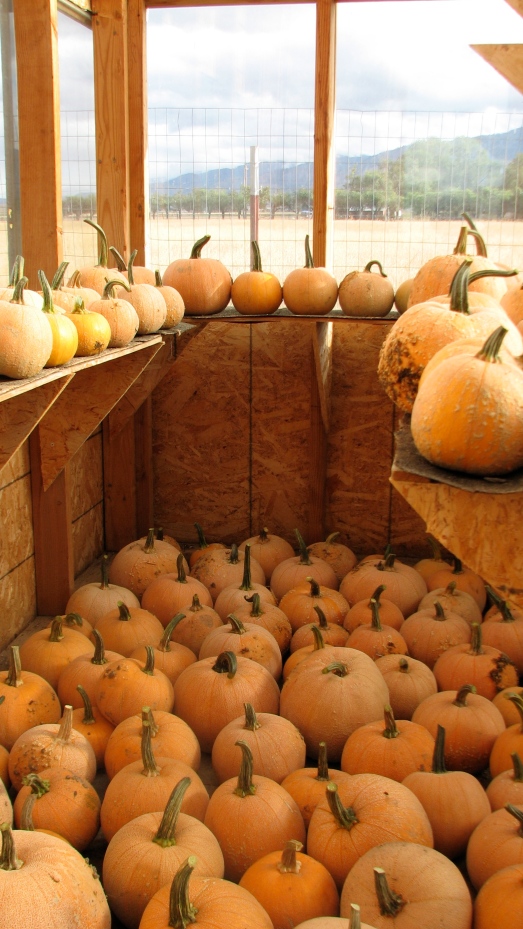
A pumpkin by any other name would taste as sweet, but the Winter Luxury Pie Pumpkin indeed holds quite a charming and delectable name for which it is well deserving. For me, Winter Luxury Pie Pumpkin has become a staple. It will be one of those varieties that I grow year after year, not even curious of the other pie pumpkin varieties out there. This round netted squash has much in which to give thanks and at the Thanksgiving table represents a quintessential pillar of our feasting favorites: PIE! When Thanksgiving comes around there are many things I’m thankful for, a belly full of festive food, a table at capicity, joy bursting at the buttons and just when you think you’re too full, life’s just too good and you couldn’t possibly have more, there’s pie! Making your own pumpkin pie truly can’t be beat! F is for flaky crust, J is for Just one more piece and E if for ENJOY!

IMG_1597


Most Excellent Squash Pie –                                                                                                                              Recipe adapted from The Dirty Life: A Memoir of Farming, Food and Love , by Kristin Kimball

**Makes two pies** IMG_0327

Ingredients:

Crust

2 1/2 cups flour

1 tsp salt

1 cup cold butter

1/3 very cold water. I put the 1/3 cup cold water in a dish and add ice cubes to cool further.

Filling

2 1/2 pounds Winter Luxury Pumpkin or other winter squash cooked. I use a 6lb pumpkin for two pies.

1 1/2 heavy cream

3 eggs

3/4 sugar

1 tsp cinnamon, powdered ginger and cardamom (optional)

1/2 tsp ground nutmeg and salt

1/8 tsp cloves

Directions

1. Preheat oven to 400 degrees.                                                                                                                                                                               2. Wash outside of pumpkin and cut in half and scoop out seeds. Place on baking sheet cut side down with a little bit of water. Bake for an hour or until very soft. The beauty of this pumpkin is that the skin very easily peals aways from the flesh!                                                                                                                                                                                                                              3. While pumpkin is baking prepare crust. I always make mine in a food processor so it doesn’t get over worked. I add the flour and salt and buzz to combine. I then cut up the cold butter into little pieces and place in the processor with the flour. I just pulse it a few time and slowly pour in some cold water until the ingredients start to bind. I pour it out onto a cutting board and ball it up tight. Don’t over work the dough or make get is warm by handling it too much! If you feel like it’s getting warm you can put it in the fridge for a little bit. Divide into two equal ball and roll then each out and place in a buttered 9-inch pie plate. Chill for 30 minutes.                                                                                                            4. Placed cooked pumpkin in a bowl, add all filling ingredients and mix with a spoon. This filling always comes out beautifully smooth and creamy. You can use a blender if you like, but I have never had to. Jut a wooden spoon does the trick!                                                                                                                                                                                                                                5. Fill pie crusts with fill and bake at 375 degrees until center is set, about 40 minutes.

V is for Voila!

Y is for YUM!!

H is for a happy and blessed Thanksgiving!!!

IMG_1650

GIVE THANKS!

GIVE THANKS!


vaoie

Arugula Pesto Aurora

Super Moon rising above Mt. Shasta

Super Moon rising above Mt. Shasta

I keep thinking that this is an odd season, but what season is normal anymore? Will we learn to be the most flexible and diverse generation of humans living on this Earth? Will we start to understand change as normal, be easy-going and learn to purely live in the moment, as the future becomes increasingly unpredictable? Will we have to select for and breed varieties of vegetables to mature in smaller and shorter windows, because the weather tomorrow, weeks and months ahead will continue to consistently weave in and out of elements? Will we find the stability in the unsuitability?

       In a heat wave! I get the feeling that this heat is eagerly waving ‘Hello’ and I wave too; also eagerly, ‘Good-Bye,’ but it doesn’t seem to pick up the subtle cue. It took my cloths approximately 15 minutes to dry on the line the other day. 100 degree weather and a slight Southern breeze left them stiff and dry and wishing to be folded up and quickly placed in the cool dark closet of my room. I wanted to fold myself up with them, to be organized with the sweaters and to come out only when they were beckoned.

What luck that I didn’t ball up and seek solace amongst the wools and fleeces, for I would have missed last night’s party of lights! Lightening chiseled into the horizon, with a flash and low rumble boom! The clouds around us playing aurora tag with every imaginable color. Not a time to be a sweater, a time to soak in the elemental moment, be present, stable and to know of change.

With the lamenting of the heat I share with you this summery meal that I whipped up last night – served best with CHILLED white wine!

Arugula Pesto –

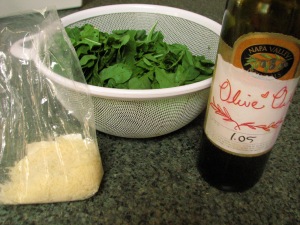
1 bag Arugula

1/4 olive oil (more if it’s not blending)

1/2 cup parmesan cheese

1/2 cup nuts – I used walnuts and like to toast them in the oven a bit to bring out a roasted flavor. Brazil nuts are great in pesto as well!

1/2 of a lemon – squeezed for the juice

3 cloves garlic – or a bulb and a half of this week’s CSA share of mini fresh garlic

salt and pepper to taste

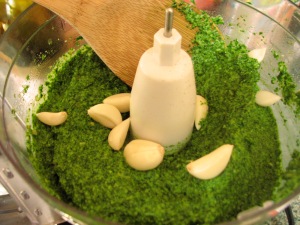
Directions – Put All in a blender and blend. Adjust different elements to taste. This pesto comes out nice and earthy. It has the taste of spring, but the influence of summer, as you can almost convince yourself there’s basil in it.

IMG_1219

Almost forgot the garlic!

Almost forgot the garlic!


IMG_1228


Little Black Dressing –

IMG_0846

The first CSA distribution has come, can it be so? Exciting comes to mind, but it’s deeper than that, truly. It’s the entrance of life and food. Meals shared, meals given. It’s the pattern of harvest, sinks full of crisp greens and tables of beets waiting for a spray down anointment, then to be polished and grouped, cheeks together squished-up smiles- CSA BASKET! MARKET! GRUB CLUB! They’re off!

The fields are REcovering from last month’s frost. With some crops there has been a complete loss, a row of proud peas still fairly stunned, stalled and burned. Many of the beds however, are coming back, their confidence a bit shaken, but  it gathers momentum as the days prove their warmth over and over again.

One of the farm frost-free champions has been the lettuce bed, which now glows and I’m not personifying this one! Salad time! A farm fresh salad is one of my all time favorite foods! Big leafs of lettuce crunchy and hydrating, not the typical ‘soul food,’ but you can’t tell mine otherwise.

IMG_1044

My dear friend Kate Sanderson helping with harvest! She's a super star farmer from the days at Green Fire Farm!

My dear friend Kate Sanderson helping with harvest! She’s a super star farmer from the days at Green Fire Farm!


IMG_0911


Here are some lovely ‘go-to’ dressings- Little Black dressings if you will, the dress I never actually understood; why wear black when you could be in color! ENJOY!

Lemon Thyme Vinaigrette

*Make a jar full and keep in the fridge for up to two week.

Ingredients:

3 Tablespoons of lemon juice

Lemon zest from half a lemon

1 small garlic clove, finely minced

1 teaspoon fresh thyme or lemon thyme, minced

3 teaspoons honey (or a bit more if you have a really sour lemon) – Meyers are wonderful!

2 teaspoons white balsamic vinegar

½ cup extra virgin olive oil

Salt and freshly ground pepper to taste

Instructions:

1. In a small bowl whisk together all of the ingredients except the olive oil, salt, and pepper.

2. While you are whisking, add the olive oil in a slow, steady stream. Continue whisking until the vinaigrette is emulsified. Correct the seasonings (sometimes I add a bit more vinegar or honey) and add salt and pepper to taste.

Ashley’s Sweet Miso Ginger Sauce!

This recipe is from my dear friend Ashley of Root and Wings Jewelry. I’m pretty sure we put this on everything that special summer in Arcata.

Ingredients:

1/2 cup olive oil

1 tsp toasted sesame oil

2 cloves garlic (or more)

2 tablespoons ginger

1 tablespoon apple cider vinegar or lemon juice

1/4 cup honey or maple syrup

2 tablespoons miso paste

1 tablespoon tamari or Braggs

1/8 teaspoon cayenne to taste

(Makes 1 1/2 cups)

Blend in a Food Processor or whisk until creamy! YUM!

Oh my gosh, it’s squash!

Oh my gosh, it’s squash!

It’s the gorilla, gripping innocent female bystanders like pieces of chalk. It’s the monster in the water, circling, lurking, waiting for … that…. moment….                       It’s SQUASH!

Oh, it’s not as horrible, harry knuckled and crazy eyed as I’ve made it out to be, but squash is not the dainty heroine either. If squash were a nutritionally complete meal, we could scatter their white papery seeds out of airplanes and have them sprout throughout every corner of the globe. With the way these plants produce, there’s the potential to put Malthus’ theory slightly at bay. To ensure that you don’t get fruit the size of your entire arm, squash has to be harvested every other day at a minimum. And what do you do with those every other day yields? – As the saying goes, “Don’t leave your car window down at church in the summer, or you’ll find a bag of zucchini on your seat.”

Ok, enough of this villanizing, really. What a gift to have such a fantastic veggie able to produce in abundance. I’m not being facetious here, even if I am slightly exhausted by the constant harvesting of those prickly plants. The wonderful characteristic of summer squash is that it is immensely versatile. I can be a purest with veggies. I love squash simply grilled with salt and pepper. With this wealth of squashy abundance however, thinking outside of the recipe box is a must! Here are some recipes for you, dear CSA members, who every week probably state out loud “Oh my gosh, more squash!”

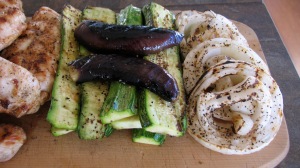
Hot off the grill!

Summer Squash Ribbons –

This concept hails from the time when my mom was a devotee of Susan Summers. In this recipe you make ribbons of squash by peeling a whole squash down with a potato peeler. You then steam the ribbons and use them instead of pasta in a pasta-like meal.

Step 1 – Take 3 large, 5-6 small summer squash and make ribbons by peeling the squash down with a potato peeler. This step takes a bit of time, love and labor. You can see my mom here ‘making ribbons’ and having them land into a large steaming pot. I’m now saying peeling, but when we were in the process of doing this we called it whittling and we whittled away, taking Appalachian accents and conjuring up stories about the good ‘ol days when grandpappy would sit on the porch and make whittled squash. Never a dull moment in this household.

Step 2-  Hunt in the fridge for everything you love to include in a nice bowl of pasta. In our fridge we found beet greens, onions, broccoli, tomatoes and, well, more squash (we’ll save those to make fritters)! I cut all the beautiful Homeward Bounty veggies into small pieces and compiled them all on a plate. I also uncovered some sausage and cooked the links up in a pan. The squash steams up quickly, so it’s nice to have all these steps done first. Steam the squash in a big steaming pot or use a steamer and cook until veggie al dente. Squash holds a lot of water, so I would pour the finished steamed squash into a colander and drizzle with a little olive oil.

Place steamed squash in a large bowl and mix in either pesto or tomato marinara. We used pesto and it was so fantastic that it would be hard to experiment with anything else, but I’m sure a tomato sauce would bring its own pizzaz to the meal. After mixing in your sauce of choice, add in your cut up veggies and meat.                                                                    -Enjoy this one with friends, a bottle of wine and a relaxing summer afternoon out on the porch!

Friends – Wine – Setting Sun – Yum!

Summer Squash Fritters – 

If this recipe was worthless and unpalatable (which it IS not), it would still hold value in the fact that saying the word fritter is down right fun!

Ingredients –

4 medium zucchini or any type of summer squash

1 onion, chopped

1 bunch parsley or cilantro, or both

2 eggs

1/2 flour or cornmeal

1 tsp cumin

1 tbsp lemon zest

oil for high heat –  safflower or grapeseed

Directions –

1. Grate squash with a cheese grater. Place grated squash in a colander and sprinkle a little salt over it to draw some of the water out. Let sit while you cut up vegetables  – chop onions and herbs. Put in a bowl, mix in eggs, spices, and lemon zest. Add squash and flour/cornmeal. The batter should be thick enough to be able to make patties in your hands, but not too dense and they’re not moist.

2. In a skillet heat up a layer of cooking oil. Grab a bit of mixture in your hand and shape into a patty and place into oil. Cook on both sides until golden brown. You can place finished fritters on a paper towel to absorb some of the oil.

– Different chutneys go great with fritters. They’re also quite tasty with sour cream or plain yogurt on top!

Alli-yum!

Alliums, a genius genus, are one we can’t get enough of. Alliums have power in the kitchen! They can bring you to your knees (as they saute in butter) and at times cause breath unease. The species are many, but you may know them best by their common names of garlic, onions, scallions, shallots and leeks. Alliums are a staple in daily meals and they’re a joy to grow. At Green Fire Farm we grew beautiful onions and patrons to the local farmers’ market swooped them up quickly.

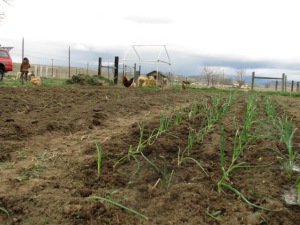
Onions take much devotion. They’ll take 100+ days to mature when sown from seed. I started my seeds in little trays in the living room window at the end of February and planted them out as the first brave Homeward Bounty transplants in mid April. When young, they’re no match for bullying invasive weeds. So the pampering begins with constant and detailed weeding. Onions grow side by side and swell with the sun and rain. They’re very proper in their little que, green tops marching in place to the hum of earthworm vibrations and the ever present 3 o’clock Shasta Valley wind.

The sweet, fresh onions are some of my favorites, my Dad’s too. Coming home after a long day on the farm, he  will greet me with, “How are the torpedo onions doing?” It’s as if the torpedo onion will go local food viral, here in Siskiyou County. People will come from far and wide, like from Yreka or Dunsmuir, and Gazelle to witness, fight over, possess the amazing (they ARE pretty amazing) torpedo onion. I can see myself at the People Food Choice Awards – “And I would like to thank God…for making the torpedo onion!” Now you might find yourself thinking, “So how are the torpedo onions?” They’re doing great and will show up in CSA boxes in a matter of weeks.

Onions, garlic, leeks, we can almost regard them as condiments- herbs. They accent and enhance, but don’t take the show or the cake, but sometimes they do take the pie. The very fine folks who make up this year’s CSA membership may be getting on the verge of onion overload. So here are some recipes that request onions to take the protagonist’s post.

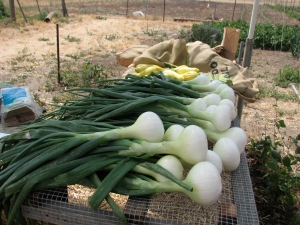
Walla-Walla sweet onions cleaned up and ready for CSA baskets.

Sweet Onion Pie – Provided by Macheesmo.com

Visit the website for pie crust recipe, use your tried and true favorite or just buy a shell –

Filling:
4 large onions (3 1/2 pounds), sliced. I would recommend a sweet variety, such as Walla-Walla or Siskiyou Sweet.
6 ounces bacon, finely chopped
1/2 stick butter
1 Cup sour cream
2 large egg yolks
Salt and Pepper

Preheat oven to 375

Cut onions into even-sized slices. Chop the bacon into tiny pieces. For veggie folks, add kale, spinach and or squash in the place of Wilber.

In a large pan, melt butter over medium heat and add bacon. Once cooked, add all your onions. Cook covered for 20 minutes. This is when you sigh, for the most amazing smell has filled the room. Ou’ de onions & butter. Que fantastique! After 20 minutes, a lot of liquid remains. Keep on burner another 20-30 and cook with lid off to evaporate some of the juices. Let the onions fully cool, accelerate by placing in the fridge.

In a bowl, add cream and yolks. Once the onions are cool, add it all together. The idea is to not cook the eggs when adding them to the onion mixture! Season with salt, pepper and herbs of choice. Grated cheese would also make a good compadre. This is pie after all, if you’re on a diet, forget about it!

Place filling in shell and bake for 80 minutes at 375. Onions take persistence, so does this pie and they both always pay off! YUMMMMMM!

O’Brien Onion Soup –

Serves 6

Ingredients:

6 T butter

4 large onions – again, I recommend sweet types

O’Brien Onion Soup

1 cup white wine  – our household adapted it using beer and it come out great!

6 cups stock – chicken or vegetable

1 T salt (if butter isn’t salted) and pepper to taste

Chop onions up into thin slices. Melt butter in a large wide pan; the wider the pan the quicker it will cook, allowing the onions to cook at one layer thick. Cook for 30 minutes, stirring frequently.

Stir in the wine or beer and bring to a boil. Scrape the bottom of the pan to get all the browned bits. Continue to scrape as you pour in the stock. Season with salt and pepper, bring to a boil then drop to a simmer for 10 minutes.

Place toasted french bread or croutons in oven safe bowls, add soup, top with cheese and broil on high for 4 minutes or until brown and bubbly.

***Don’t forget, onions are a grills best friend! It’s summer time, so I’m sure that grill has been getting some action. No grill is complete without thick slices of sweet onions. We use Montreal Steak seasoning on our veggies for embelishment. Just be careful when flipping those beautiful onion rings, because they will slip through the grill plate and you’ll just get a burning ring of fire.

More than Rad-ish!

Oh sweet and sharp radishes – they just smile, don’t you think? There is just something about the little things. You just want to squeeze their pink cheeks, give them a penny and say “now don’t spend it all in one place.” They provide something a tad different, beautiful color and a nice snappy, spicy crunch . Little, yet mighty. Maybe that’s the root of my affection.

The variety I’m growing this year is called French Breakfast radish. For those folks who like to still use the fodder of years past, you may also refer to them as Freedom Breakfast radishes. This particular variety has a pleasant amount of spice that adds without over powering. This characteristic makes is lovely for raw snacking!

Radishes usually find their way to the dinner table folded into the leaves of lettuce and other veggie delights in a salad. Things are not always as they appear; the unassuming radish can wear many hats. Try something new. They’re great in potato salad & tuna salad or try with arugula on warm pasta. Here are some recipes for thought –

Radish Curry Saute –

-Radishes don’t have much bulk to them, so the volume in this recipe isn’t high, but it makes a great small side dish or served on top of rice. Jonathan and I gave it a thumbs up! Serves 2 – takes 15 minutes

A bunch of radishes with leaves                          

One small onion, sliced

Garlic- 2 or 3 small cloves crushed

Turmeric powder- a pinch

Mustard seeds – a pinch

Curry powder- a pinch

Salt and pepper to taste

In a pan, add some oil. When it is hot, add the mustard seeds, curry and onions. Saute until onions turn slightly brown.

Add the garlic and turmeric powder, mix up well.

Add the radishes – Cook covered for about 3-4 mins. It’s nice to have the radishes soft, yet crunchy.

After you remove the radishes onto a plate, in the same pan quickly you can saute the leaves for a few seconds and add it to the top of the radishes. Great served over rice.

Radish Top Soup – 

– I’ve made this recipe twice this week, it’s lovely. It comes out nice and hardy, like a super food soup. Ironically we’re actually experiencing bona fide soup weather, so this is June in Siskiyou County- humm? Serves 2-3

One bunch of radish greens (and or any other greens you may have)

One small onion, chopped (I made it a top – top soup and used the green tops of an onion as a substitute) 

Few cloves garlic, chopped

One medium potato, cubed

Chicken/Vegetable broth – 3 cups

Milk or Creme – 1/4 cup

Salt and Pepper to taste

Radishes, sliced for garnish * a little lemon squeezed on top was quite nice as well!

Add oil or butter to a soup pot and saute onions and garlic until aromatic.

Add potatoes and greens. Add broth and bring to boil until potatoes are tender.

Allow soup to cool slightly. Ladle into a blender and blend until smooth. Add milk and transfer back to pot to reheat.

Kale Yeah!

The first harvest has come and gone; the flood gate has opened and harvest knives, rubber bands, washing tables and packing tubs are floating in on it’s waves. It’s finally the time in the season where harvesting will start taking front and center, that is along with distributing produce, weeding, trellising, watering as well as sewing and prepping beds for fall crops. A mile-stone, baby farm and farmer’s first harvest composed of bunches of kale and bags of loose leaf spinach.

It was in 2005 when I first ‘ate the kale,’ something analogous to ‘drinking the koolaid.’ Of corse that was the year that I moved to Arcata. Kale may be the mascot food for the coast. On those costal farms they can grow it year round. Kale is such a beautiful and hardy green. I truly find that my body craves it. I’ve sense exposed my family and friends to this frilly leaf  wonder, the cult is growing! Kale is extremely versatile and packed with nutrients. You can steam kale, saute kale, bake kale, make an egg dish, rice dish, pasta dish,casserole, soup, lasagna, salad…you get the point; it’s as multifaceted as shrimp. There are many varieties of kale. Two common types, the types being grown on Homeward Bounty, are Red Russian and Lacinato, which is sometimes called Dinosaur kale.

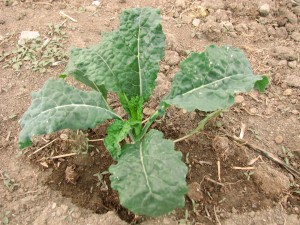
Lacinato Kale

Lacinato Kale

Red Russian

Red Russian

I know that kale may be new to many, so to help you get hooked (because I know of a good source), I have compiled some of my favorite ways of preparing the one and only, extremely yummy Brassica Oleracea.

Massaged Kale Salad

1 bunch Kale

olive oil

dash salt

1/2 Tbs lemon juice (optional)

This is an Arcata classic! Tear the kale leaves from the stalks and into bite size pieces. Place kale pieces into a bowl, drizzle with olive oil, add salt and lemon juice if available. Dig in with clean hands and proceed to massage your meal, this is where the Arcata bit comes into the picture! Don’t forget to give it love, thanks and positive energy. It’s probably most therapeutic for the chef, the oil even acts as a moisturizer. Massage the kale until it’s wilted and glossy, a thorough minute will do. I find that this method almost gives the kale a seaweed texture. It comes out divine! I recommend adding pumpkin seeds, grated beets and carrots, avocado and your favorite dressing.

Kale Chips –

Kale Chips

Kale Chips

1 bunch Kale

olive oil

dash salt

parchment paper (optional)

Heat oven to 350 degrees. Remove kale from the stem. A good technique of doing this is by grabbing the stem from the bottom and running your hand across the rib instantly separating the leaves. Break the kale up into chip size pieces. Toss kale in a bowl with olive oil and salt until thoroughly coated. Place kale on a cookie sheet, lined with parchment paper if you like for easy clean. Bake for 10 – 15 minutes or until crisp.  *Grind kale chips into flakes and add to popcorn..oooh-la-la!

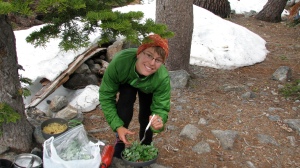
Kale can be dressed up or kept simple. I’m sure it can be found on the menus of some of the nicest city restaurants. At the same time it packs light, stays crisp and makes a lovely addition to any camping adventure. Here are some of kales most recent adventures, a snowy hike up to Beautiful Porcupine Lake – yumm!

Now that’s fine dining!